 |
The instructions in this article relate to Utility Billing. The icon may be located on your StrataMax Desktop or found using the StrataMax Search. |
This article covers entering meter readings, processing bills, and printing and emailing bills. It also outlines how to enter the meter readings manually, and how to export and import readings.
Utility Billing Video
Enter Meter Readings Manually
Cents Adjustment is enabled in File > Configure.
- From the Utility Sub-Group, search or select the Utility Billing menu.
- Select the Reading Entry tab, and enter the Reading Date.
- Click the Supply Type drop-down menu to select the required Supply Type.
- Click the Change A/c button and select a lot, then click OK.
- The Meter No, Tariff, Last Reading Date, and Last Reading will be displayed for this lot.
- Click in the New Reading cell and enter the new meter reading.
- Press the Enter key on the keyboard, and the system will automatically calculate of Units, Days, Months and Amount.
- If there is more than one meter for the lot, enter the reading for each meter in the New Reading cell.
- If the reading is an estimation, click in the Estimated cell and enter 'Y', this will reflect on the bill when issued to advise the lot that the reading has been estimated.
- The calculation field shows the breakdown of the total charges based on the tariff settings.
- GST will be calculated on the total amount of the meter readings. Cents adjustment will be automatically deducted based on the total amount of the meter readings and the GST amount due.
- Sundry Charges should automatically be applied to the account – see Add Sundry Tariffs to automatically bill for further details.
- The Total amount due will be calculated from the total of the bill, plus the GST owing and any cents rounding factored in.
- Click Save (or press Enter).
- This will then automatically select the next Account Code in the list.
- Follow the steps above to enter the meter readings for other lots.
- Prior to processing bills, click GoTo > Reading Record List. Refer to relevant section below in this article, which covers the Reading Record List.

Export / Import Meter Reading Information
When creating the export file, the information will include all available columns: Building Number, Account Number, Lot Number, Unit Number, Name, Meter Number, Date Last Reading, Last Reading.
The base column information must include the Building Number, Meter Number, Date Last Read and Last Reading in order to be available for import.
The following section will provide information on exporting the meter info, changing the meter reading date and meter readings, and then importing the file with the new data.
This can be useful in instances where there is a third party recording the new meter reads; in fact, the export file could be provided to these sorts of parties to complete and send back to the strata manager to import into StrataMax.
For any Utility Sub-Group that includes more than 50 lots, this method is arguably more efficient than entering each reading manually. It should be noted that there is some formatting requirements to allow this report to export and import correctly, which has been noted below.
Export Meter Readings
- From the Utility Sub-Group, search or select the Utility Billing menu.
- Open the the Reading Entry tab, and select the Supply Type from the drop-down list (in the bottom of the screen).
- Select Options > Export Meter Info.
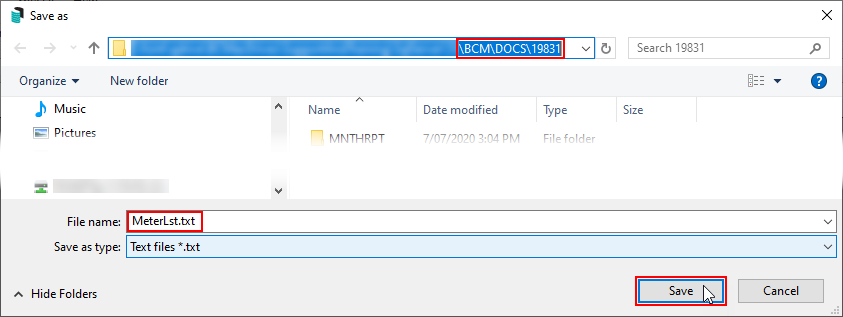
- A Windows prompt will appear to save the text file 'MeterLst.txt'.
- The file will be saved to the StrataMax network drive \BCM\DOCS\<EBULDINGNUMBER> by default.
- The file will be saved to the StrataMax network drive \BCM\DOCS\<EBULDINGNUMBER> by default.
- Proceed to the next section of this article to open the file in Excel, and enter the meter readings.

Enter Meter Readings in Excel
Once the file has been exported, the text file needs to be opened in Excel to enter the new meter readings. Some of the below steps may differ depending on the version of Excel.
- Open Excel, and click File > Open.
- Navigate to network drive,\BCM\DOCS\<EBULDINGNUMBER>, where the export file was saved.
- Change the File Type drop-down menu in the Excel Open File dialogue to All Files.
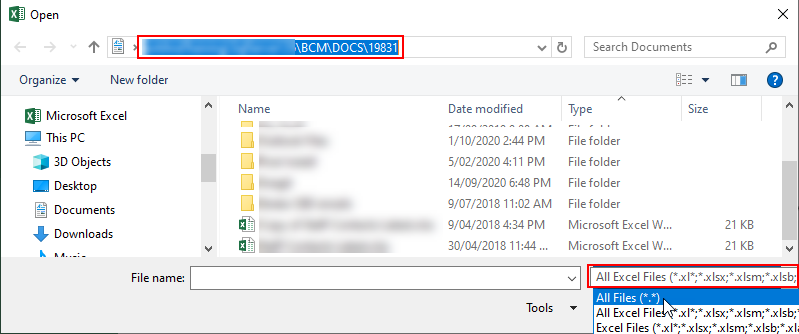
- Select the MeterLst.txt file and click Open.
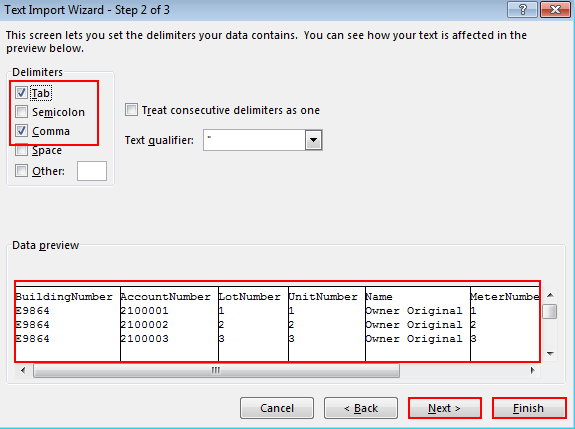
- From the Import Wizard, select Delimited as the Original Data Type, then click Next.
- Tick the Comma box as the Delimiter.
- Check to ensure that the fields are separated correctly in the Data Preview box, then click Next.
- The Column Data Format should be set to Text for all columns (highlight all columns).
- Click Finish.
- For each lot, change the Last Reading Date to the date of the new reading.


We recommend using the Find and Replace function in Excel, on the DateLastReading column to quickly and easily update each line item.
- Amend the LastReading column information to reflect the new meter reading for each lot.
- Once all readings are entered complete, save the file in the following directory:
- \BCM\DATA\<EBULDINGNUMBER_CURRENTYEAR>
and - Name the file IMPREAD.txt (File Type: Text (Tab Delimited).
- \BCM\DATA\<EBULDINGNUMBER_CURRENTYEAR>
- Select Close.
Import Meter Readings
The Supply Type that was used to export the meter readings needs to be used when importing them back in after making the changes in Excel. If the file contains meter readings that aren't the same Supply Type, the file will not import.
- From the Utility Sub-Group, search or select the Utility Billing menu.
- Select the Reading Entry tab.
- Click the Supply Type drop-down menu to select the required Supply Type.
- Select Options > Import Readings.
- The system will attempt to find the file in the directory \BCM\DATA\<EBULDINGNUMBER_CURRENTYEAR>, and enter meter readings automatically.
- Prior to processing bills, click GoTo > Reading Record List. Refer to relevant section below in this article, which covers the Reading Record List.
View Imported Readings
If the reading information is being imported, and it has something unusual in the file and does not process as expected. This information can be viewed after the import stage and deleted where required to start the import process again. This step would be applied after trying to import the .txt file and includes the below message:

- From the Utility Sub-Group, search or select the Utility Billing menu.
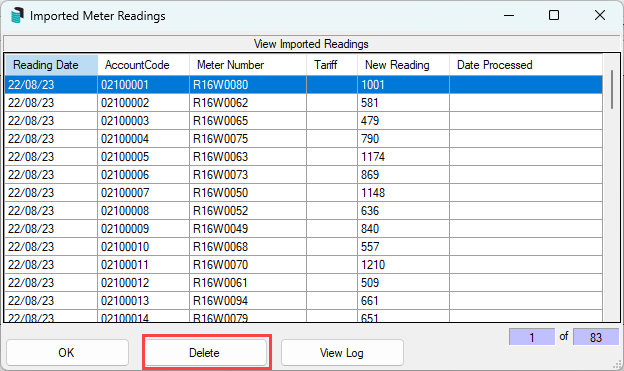
- Select Options / View Imported Readings. There will be a table of imported readings. Review and check that these have been processed from the Meter Maintenance tab.
- To select all records in the table, Crtl + A to select all records and click Delete.
- Click Yes to message: Delete selected records. Click Confirm to delete these readings.
- Refer back to the current file for import and retry the import process again, detailed in the heading above.

Reading Recording List
The Reading Record List is available as a search, allowing the report fields to be customised and results to be reported across all buildings, if required.
Delete Current Reading
If current readings have been entered incorrectly (e.g. a sundry charge has been omitted from the bills, or the tariff rate was incorrect), this section covers how to delete this reading.
If the current read has been processed, this will need to be reversed first before proceeding with delete.
- From the Utility Sub-Group, search or select the Utility Billing menu.
- Select the Process Billing tab and tag the lot(s) required (to tag all click Select All or Ctrl + A on the keyboard).
- Click the Reverse Last Bill button.
- Ensuring the the Reading Entry tab is displayed in the Utility Billing window, click Options > Delete Current Readings.
- Select the lot accounts to delete the current reading for.
- Make any adjustments to tariff rates, or add sundry charges etc., as necessary.
- Re-enter the correct reads from the Reading Entry tab, reprint the Reading Record List for checking, then proceed to Process Billing.

Recalculate Current Bill
This section covers how to recalculate the meter readings in the event that the readings were entered, but the charge rate is incorrect. This process can only be done if the bills have not been processed.
If the bills have already been processed, the bills will need to be reversed before proceeding with a recalculation.
- From the Utility Sub-Group, search or select the Utility Billing menu.
- After making the necessary changes to the tariff, sundry charge, or rebate, select the Reading Entry tab.
- Select the Reading Entry tab, and enter the Reading Date from the drop-down menu in the top right.
- Click the Supply Type drop-down menu to select the required Supply Type.
- Click Options > Recalculate Current Bill.
- Tag the required lots (click the Select All button on the right if all lots need to be recalculated).
- Click the Recalculate button.
- Prior to processing bills, click GoTo > Reading Record List. Refer to relevant section below in this article, which covers the Reading Record List.
Process Utility Bills
This procedure will process the readings entered and saved for each Debtor account, and produce a Utility Bill for each Debtor.
- From the Utility Sub-Group, search or select the Utility Billing menu.
- Select Process Billing tab.
- Tag all required Debtors (to tag all click Select All or Ctrl + A on the keyboard).
- Select Process Bills.
- Select Close.
Utility Billing | Contact Preferences
Prior to printing or emailing the bills, the Contact Preferences will need to be set for each lot account. These preferences can also be set in Debtor Maintenance, at setup.
If there are multiple contacts for a Debtor account utility bills & arrears will only print to post to the first contacts address however multiple contacts can receive the bills via email if required.
If an Occupier has indicated a preference to receive bills via email, ensure the email address has been entered in Debtor Maintenance
- From the Utility Sub-Group, search or select Utility Billing.
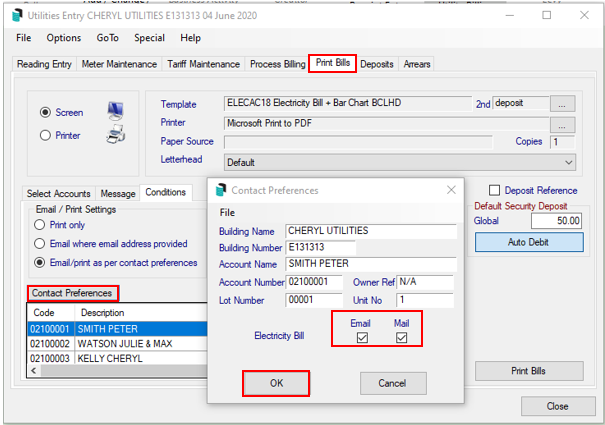
- Select the Print Bills tab, then click the Conditions tab in the middle section of the window.
- Ensure you highlight a debtor with an email address, then click the Contact Preferences button to open the 'Contact Preferences' window.
- Set the preferred option for delivery of the bills; Email, Mail, or both, then click OK.

Utility Billing | Contact Preferences Report
The contact preferences for all debtors can be reported in an Excel sheet.
- From the Utility Sub-Group, search or select Utility Billing.
- Select the Print Bills tab, then click the Conditions tab in the middle section of the window.
- Ensure you highlight a debtor with an email address, then click the Contact Preferences button.
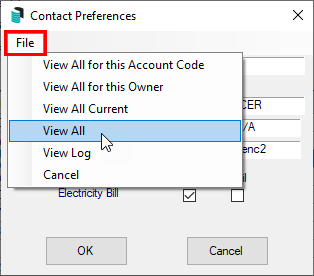
- In the 'Contact Preferences' window, click File > View All to display the 'Email and Mail Manager' screen.
- In the 'Email and Mail Manager' screen either a '1' or a '0' will be displayed for each debtor in the 'Email' or 'Mail' columns; a '1' meaning 'Yes' and a '0' meaning 'No'.
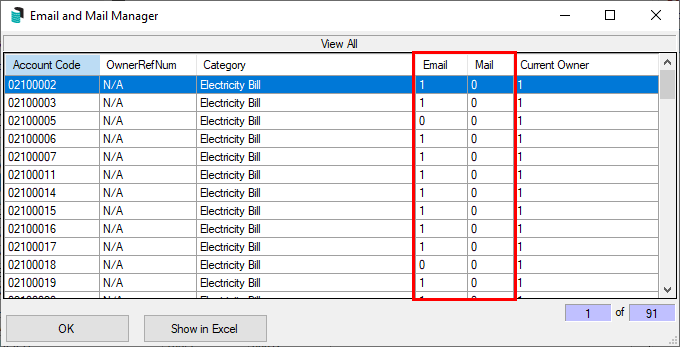
- You can also click the Show in Excel button to export this table to an Excel sheet.


Print or Email Utility Bills
Once the utility bills have been processed, the final step in the utility billing process is to print or email them.
If this is the first time printing a utility bill and there is a requirement for the security deposit to be shown, ensure that the instructions for Security Deposits have been completed. Also, for any lot accounts that want to set up a direct debit, a template that includes merge field field 60 for direct debit instructions, will need to be used. Please see the Direct Debit article for more details.
If bills are being printed for the first time, it is recommended that the bill for the first lot only be previewed on screen. This provides the opportunity to ensure that it meets requirements. If any changes are required, this can be completed prior to printing all bills.
- From the Utility Sub-Group, search or select the Utility Billing menu.
- Select the Print Bills tab.
- Tag all required lot accounts (to tag all click Select All or Ctrl + A on the keyboard).
- Select Conditions tab and ensure the EMail / Print as per Contact Preferences radio button is selected.
- Contact Preferences for Utility Bills are set in the Roll menu of the Main Building linked to the Sub-Group.
- Click the Print Bills button.
- Where a reading has been entered and flagged as an estimate, when the bills is printed, the word 'Estimated' field will be displayed on the bill as shown below. The system picks up the estimated field (Y) and inserts it next to the appropriate tariff reading.
- The bill is not actually charged to the lot accounts account until the Bill is printed.
Once the utility bill has been printed there will be a copy available to re-produce at any time via the Stored Reports menu.

Utility Templates
Utility Templates can be set from the Print Bills tab in the Utility Billing module. The template set should include a deposit slip.
To review any available templates, select them from the list and click 'Preview.' Once the desired template has been selected, click 'Save as Global.'

