|
This article covers an overview of the Task Management interface and the various options, functions, and buttons available. The icon may be located on your StrataMax Desktop or found using the StrataMax Search. |
The Task Management screen provides users with the tools to efficiently manage the varying tasks associated with strata management, ensuring nothing is missed. Tasks can be associated with a building; where not associated to a building the task is considered an office task.
Task Management | Task Details Overview
This section provides an explanation of fields & functions available in the Task Details window, which appears when the user creates a new task or opens an existing task.
- Due Date: The date the task is due.
- Title: Used to identify the task name, and is also used by the search field in the main Task Management screen.
- Description: Additional text to provide a more detailed explanation of the task, and is also used by the search field in the main Task Management screen.
- Building: The building the task relates to. If it's left blank, the task is considered an office task. This is also used by the search field in the main Task Management screen. Remove the building selection by clicking the red X.
- State: A drop-down menu to help manage the various states of a task. Available for selection are Not Started, In Progress, Blocked, Abandoned and Complete. The state of a task can be updated manually or by drag and dropping a task to a different column in the Kanban view.
- Priority: A pick-list to assist with managing the urgency of a tack. Available for select are Low, Medium and High.
- Assigned To: A pick-list of users & user groups from StrataMax security. Tasks can be reassigned whenever required.
- Category: A pick-list that can be managed via the Categories button to assist in grouping tasks such as Maintenance, Correspondence, Procedures.
- Add Link: URL & file links can be added to provide quick access to information, procedures etc. Multiple links can be added along with a name for easy identification. To add a link, type or paste the website URL or the file path into the URL field, then type a name, and click the green plus button. Once added, any links will appear in the Links tab where they can be clicked to open them.
- Documents / Add Document: The Documents tab will display any documents that have been added to this task. Open the document by clicking the icon to the left of the name. To remove the document from this task, click the red X button to the right of the name. To add documents, click the Add Document button in the bottom right of the Task Details window and locate the document from the DocMax Select Document window.
- Checklist: For tasks that may require multiple action points, items can be added to the checklist and marked completed individually. Once all items in a checklist are marked as complete; the task state will update to Complete also.
- Checklist items cannot be edited, so if there is a typo or mistake, the checklist item needs to be deleted by clicking the red X and then added as a new checklist item.
- Notes: Notes can be added to a task to help capture important information throughout its life cycle. These will present with a date and username on them.
- Notes cannot be edited, so if there is a typo or mistake, the note needs to be deleted by clicking the red X and then added as a new Note.
- Save and Close: Click to save the new task or any changes and close the Task Details window.
- Close: Click to close the Task Details window without saving.

Task Management | Buttons

- View is used to select the preferred view; Kanban, List, or Calendar.
- Search opens the Search Tasks screen.
- Categories opens the Task Category Management window to manage categories that can be set within a task. The delete icon will only be available if a category has not been used. Refer to the Categories section below for further information.
- Schedules opens the Scheduled Tasks window where scheduled and event tasks are managed. Refer to the Scheduled & Event Tasks section below for further information.
- Add Task creates a new task.
- Mark Selected as Complete can be clicked when a single or multiple tasks have been selected and need to be completed.
- Delete Selected can be clicked when a single or multiple tasks have been selected and need to be deleted.
- Close closes Task Management.
Create a New Task
To create a new task follow the below steps:
- Open Task Management.
- Click on the Add Task button.
- When in Calendar view, the user can double click within a date to create a new task, or open an existing task.
- Enter any information required in the task (see the Task Details Overview section above for an explanation of the various settings and fields).
- Click Save and Close.
Edit/Update a Task
This section describes how to edit / update a task. A task can also have the state updated by drag and dropping it to a different column in the Kanban view.
- Open Task Management.
- Locate the required task and double click to open it.
- Update information as required (see the Task Details Overview section above for an explanation of the various settings and fields).
- Click Save and Close.
Delete a Task
This section describes how to delete a task, which cannot be undone.
- Open Task Management.
- Locate and select the required task.
- Click the Delete Selected button.
Task Management | Logs
When a task is created, deleted, or when any of the following fields are updated, details will be recorded in Log Viewer under the category of 'Tasks'.
|
 |
Task Management | Interface
There are three views available in the Task Management screen, and there is also the Search Tasks screen, which can be used to access all tasks, report / export tasks, and create Dashboard items, etc.
Each user can set their desired default view in the Configuration window.
List View
By default, the list view displays tasks in Due Date order and can be changed by clicking on the column headers. To open a task, simply double-click it. The percentage number in the Progress column observes the Checklist items within the task. A search bar is available above the list and will search the task Title, Description, and Building.

Kanban View
The kanban view displays tasks in columns based on the state field. Additional columns of Abandoned and Blocked can be included if the setting is ticked within the view or in configuration. Tasks can be dragged from one column to another which will update the state of the task based on where it is dropped, and to open a task double click on it. A search bar is available above the list and will search the task Title, Description, and Building.

Calendar View
The calendar view allows users to see tasks within a monthly or weekly view, with additional configuration available to show / hide weekends. A search bar is available above the list and will search the task Title, Description, and Building.
When in Calendar view, the user can double click within a date to create a new task, or open an existing task.

Task Management | Filters
The filters available in Task Management remain the same regardless of whether using the Kanban, List or Calendar views. The filters are used to manage what tasks will display.
Date Filter
By default no date filters are automatically applied. To limit tasks displayed, select from the quick date filters or set a custom date range.
Tick Show completed in last XX days to include completed tasks within the set number of days. The number of days displayed in this setting is based on the number set in the Configuration. Tasks that have been completed will show with a line through them.

Assigned To
By default the assigned is set to your username. Select either other users or user groups to view tasks assigned to them. To view tasks assigned to all users & user groups tick Show All. To view tasks assigned to your username of security groups you are a member of, select Me and my groups.

Building / Company Filter
By default All Buildings is set when opening Task Management, but other filters can be selected.
- All Buildings will display tasks for all active buildings.
- Current Building will display tasks for the currently selected building.
- My Buildings (Account Manager) will display for the users buildings where they are set as the Account Manager. The user name must be linked to the Account Manager in Account Manager Edit.
- Management Office can be selected if the Management Office function is being used in StrataMax. Once ticked, select the required Management Office to view the tasks for the buildings associated with the selected Management Office.
- Office Tasks can be ticked to display Office Tasks, that are not associated with a building.

Category Filter
By default no category is selected. To filter by a specific category, untick Show All and select the required category.

Kanban Options (only displayed in Kanban view)
Tick Show All Columns to include any tasks with the state of Abandoned and Blocked.

Calendar Options (only displayed in Calendar view)
- Show Weekends can be ticked to display weekend days within the calendar.
- Month View and Week View can be selected to view the calendar as either monthly or weekly.

Categories
Categories can be assigned to tasks to assist with grouping them, whether it be via filters, searching, reports, or Dashboard items.
- To add a new category, select Add Category.
- To edit a category, change the Category Name and select Save Changes.
Categories are not able to be deleted if they have been used for a task.

Scheduled Tasks
Scheduled tasks can be used to automatically create recurring tasks not associated with a building. A task created based on scheduled tasks is considered an Office Task, unless a building is assigned after its creation.
Once a schedule has been created in Task Management, the tasks for that schedule will be generated automatically on a daily basis. This automation is based on a backend system that is managed by the StrataMax Support team and cannot be altered by users.
Add a New Schedule Task
To add a new schedule, follow the below steps:
- Search or select Task Management.
- Click the Schedules button (bottom right) to open the Scheduled Tasks window.
- Click the Add Schedule button in the bottom right.
- Enter the basic information related to the schedule. This information is not included within tasks created.
- To disable a schedule if it's no longer required, remove the tick in the Enabled box.
- Set up the Task Template; the task template will be used for tasks automatically created based on the schedule:
- Set the required task title.
- Use the description to include any additional information that may be required include help links for procedures etc.
- Set the priority of the task.
- Select the user or user group the tasks will be assigned to.
- Set the required category if applicable.
- Set the Notice Period Before Due; this will be used to calculate and populate the due date field within tasks automatically created based on the schedule.
- In the Schedule Settings section:
- Select the required frequency.
- Set the required start date. Note that this is the date when the backend scheduler will create the first task. i.e. the first task won't be created until this date rolls over. So, if this date is six months in the future from today's date, then that is the day the tasks will be created and appear in the Task Management screen.
- Set the required end date if required, no further tasks will be created after this date.
- Tick skip weekends if required (tasks will be set to the next Monday where they fall on weekends).
- Days Due After Creation: This determines when the task is due. So, if the Frequency is set to 'Monthly', and the Start Date is '01/01/2025' and the Days Due... is '14' then the due date for each of the tasks will be on the 14th of each month.
- In the Task Checklist Template section (top right), add any checklist items that are required on the tasks by typing the details and clicking the Add button. If a mistake or typo is made, the checklist item needs to be deleted and a new one created. Click the up or down arrows to change the order of the checklist items, and click the red X to delete a checklist item.

Edit a Schedule Task
To edit a schedule setup follow the below steps. This will not change any tasks that have already been created.
- Select Task Management.
- Click on Schedules.
- Select from Available Task Automation list.
- Make any required changes.
- Click on Save.
Delete a Schedule Task
To delete a schedule setup follow the below steps. This will stop any further Tasks being created based on the setup. It will not delete any Tasks already created.
- Select Task Management.
- Click on Schedules.
- Select from Available Task Automation list.
- Click on Delete.
Event Tasks (Automation)
Event Tasks observe various areas in StrataMax and once they have been set up (and enabled), they are created for the upcoming dates based on the setting 'Months to look ahead' for all buildings.
An event date can have multiple tasks automatically being created if required. Event Types that are currently available for selection include:
| Task Management Event Type | Area | Data Source |
|---|---|---|
| Building Transfer In | Transfer In/Out | Earliest Date of Transfer. This also contains a default checklist for common tasks that are recommended to be completed. |
| Building Valuation | Inspections | Default Inspection Type - Building Valuation |
| Building Year End | Building Information | Financial Year End |
| Contract Expiry | Contracts Register | Expiry Date |
| Contract Increase Due | Contracts Register | Increase Due |
| Contract Next Option Due | Contracts Register | Next Option Renewal Date |
| Emergency Lighting Inspection | Inspections | Default Inspection Type - Emergency Lighting (Next Planned field) |
| Fire Safety Inspection | Inspections | Default Inspection Type - Fire Safety Report (Next Planned field) |
| First AGM | Building Information | Meeting Type - First Annual General Meeting |
| Health and Safety Inspection | Inspections | Default Inspection Type - Workplace H & S (Next Planned field) |
| Insurance Due | Insurance | Building Type - Due Date |
| Insurance Valuation | Inspections | Default Inspection Type - Insurance Valuation (Next Planned field) |
| Levy Year End | Building Information (New Building screen) | Levy Year/AGM |
| Lift Registration Due | Inspections | Default Inspections Type - Lift Registration (Next Planned field) |
| Next AGM | Building Information | Meeting Type - Annual General Meeting |
| Next General Meeting | Building Information | Meeting Type - General Meetings |
| Next Sinking Fund Report Due | Inspections | Default Inspection Type - Sinking Fund Report (Next Planned field) |
| Termite Inspection | Inspections | Default Inspection Type - Termite (Next Planned field) |
| Unfinished Work Order | TaskMax | Description: Contractor and Finish Date; Due Date is the Notice Before Due; Title: Work Order Subject |
For more details on default inspection types and their applications, refer to the Inspections article.
Add a New Event Task
Follow the below steps to setup event tasks.
- Select Task Management.
- Click on Schedules.
- Click on Add Event.
- Enter the basic information related to the schedule. This information is not included within tasks created.
- To disable an event task if no longer required untick Enabled.
- Setup the Task Template; the task template will be used for tasks automatically created based on the event dates.
- Type the required Task Title.
- Use the Description to include any additional information that may be required to include help links for procedures etc.
- Set the Priority of the task.
- Select the user or user group for the Task in the Assigned To drop-down menu.
- Select the required Category if applicable.
- Under the Event Settings section, select the Event Type from the list of available events.
- Set the Notice period before due; this will be used to calculate and populate the due date field within tasks automatically. Use a minus if task due date needs to be after the event date.
- Add any checklist items that are required on the tasks.
- Select Save.

Edit an Event Task
These steps are for editing an event task setup. This will not change any tasks that have already been created:
- Select Task Management.
- Click on Schedules.
- Select from Available Task Automation list.
- Make any required changes.
- Click on Save.
Delete an Event Task
These steps are for deleting an event task setup. This will stop any further tasks being created based on the setup. It will not delete any tasks already created:
- Select Task Management.
- Click on Schedules.
- Select from Available Task Automation list.
- Click on Delete.
Quick Tasks
Shortcut icons used to create a task are available from the below areas of StrataMax; these are intended to allow for quick creation of a task without the need to navigate to Task Management.
- Building Information.
- DocMax (a saved document).
- Bank Account Setup.
- Office Bearers.
- Invoice Hub / Review Invoices.
- Bank Rec.
- Building Transfers.

Search Tasks
Tasks are available for direct search in Task Management using the search button or by selecting Search Tasks.
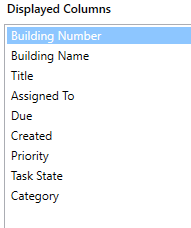
The following is an example of the restriction and column display fields for All Overdue Tasks.
All Overdue Tasks (Search Tasks)
Restrict To:

Displayed Columns: