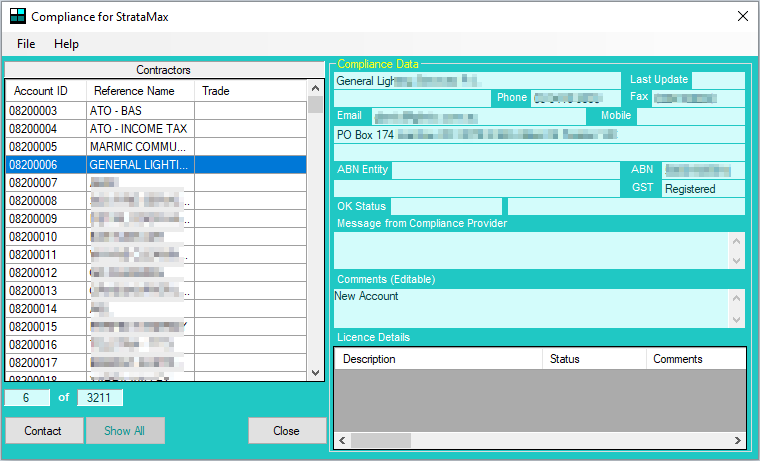
 | The instructions in this article relate to Compliance. The icon may be located on your StrataMax Desktop or found using the StrataMax Search. |
Compliance has been designed for clients to manage information relating to the suppliers and creditors in StrataMax. This data can be manually entered and maintained or it can file that is supplied by a third party compliance provider, to then be imported into StrataMax. The following compliance service providers are able to receive and supply StrataMax compatible data files:
- Trades Monitor: www.tradesmonitor.com.au
- ARM: www.arm-cc.com
Third party compliance service providers usually validate the following types of information:
- Public Liability Insurance
- Professional indemnity insurance
- Work Cover insurance
- Licences
- Contractor Registrations and ABN
- GST status
- Contractor Safety Compliance
Please check with each provider to confirm the precise nature of the service that they offer.
Introduction to Third Party Compliance Providers in StrataMax
In order to utilise data provided by a third party it is necessary to generate a file of creditors from the master chart, which is issued to the provider for validation. The supplier will then return the validated file for import into StrataMax.
Only creditors that are listed in the Master Chart are included in the compliance process. The process does not extend to creditor accounts that only exist locally in a building.
For this reason, it is particularly important to ensure that creditors linked to a building, which are imported during the Transfer In process, are run through the change code process to match the Master Chart. This will prevent the creation of duplicate creditors in the local building with differing codes to the equivalent creditor record in the Master Chart. Instructions can be found in our article for Change Code Number.
The process flow below provides a high level overview of the processes involved.

Security Setup for Compliance
The following security permissions should be reviewed and aligned with office access as needed. This can be set at a group or user level as needed, and will offer permission to access the Compliance area and also different option for editing and modifying information.

Set Up a Compliance Provider
Contact the preferred provider and sign up for their service.
Once a compliance verification service has been agreed with the chosen provider and the service has been activated, some minor configuration needs to be completed within Compliance.
- Search or select Compliance.
- Click File > Select Compliance Provider.
- Trades Monitor
or - ARM Compliance (requires StrataMax to activate the token, please email support@stratamax.com)
or - None (for self-managed)
- Trades Monitor
- Clicking ARM Compliance or Trades Monitor will present a Reference field.

- Enter the reference number in the Reference field.
- This reference number is a unique client reference that the service provider will receive in the export file to identify the client. Once entered into the Compliance Setup screen, this number will be included in the files that are generated and exported to validate identification to the provider.
During setup of Compliance, it is recommended after the Export to Compliance Provider that the provider is changed to None until the Import file is ready for importing. This will allow the system to function as normal until the Compliance data is available.
If the service provider has not provided a client reference number, contact the service provider to obtain this reference. StrataMax does not have access to this information, only the service provider does.
Please Note: Imports into Compliance will not update any information fields in Creditor Maintenance.
Accessing the Compliance Module
The Compliance menu can be accesses from a number of different locations within StrataMax. The primary way of accessing this menu is to search for it, or to click the Compliance icon. The below are shortcuts that exist within other menu options:
Creditor Invoices
- Search or select Creditor Invoices.
- Click GoTo > Compliance.
TaskMax
- Search or select TaskMax.
- Click File > Compliance.
Processing with Compliance
Compliance Codes / Description
The compliance data provider’s response file will include a range of information about the creditor/supplier including a rating category. The rating category is generally referred to as Y ‘Approved’ and should be used as an easily recognisable key for the suitability of a contractor/supplier for a job.
Editing the Default Compliance Codes
Default codes are already set up within Compliance. There is a facility to change the compliance action defaults if the provider has provided further information in relation to a creditor or internal policies have been specified that need to be applied in relation to the validation status of suppliers.
StrataMax has three codes it uses to action Work Orders, Payments, and Invoice Entry.
- Valid
Suppliers confirmed as Valid will be accepted without requiring confirmation (if a code is set to Valid the compliance prompt will not appear when using a valid creditor). - Invalid
Suppliers that will not be accepted under any circumstances (the system will alert that it is not a valid creditor and it cannot progress any further). - Verify
Suppliers that will be only used upon confirmation from the user. When a supplier with Verify status is selected, StrataMax will notify the user with a pop up window to determine which course of action should be taken i.e. to confirm usage or view further information on that creditor.
Default Compliance Codes
Default actions should only be changed if the service provider or the office internal compliance policy maker has advised to do so.
Default actions are pre-configured within StrataMax for each compliance code. The default configuration should be used when the same action for each compliance code is to be used, regardless of the activity being performed.
As a result the default actions are only defined within the first column (in the Action for Work Order) column. By default, the remaining columns are left blank, which means that the blank columns (Action for Payment and Action for Invoice Entry) will utilise the same defaults.
However, for each code it is possible to set a different default action for each activity as follows:
- Action for Work Orders - used when entering Work Orders via TaskMax.
- Action for Payment - used when creating payments in Payments icon.
- Action for Invoice Entry - used for entering invoices in the Creditor Invoices menu.
If a different action needs to be set for each of the three activities, then they must be explicitly added to each activity column.
Edit default actions for Compliance Codes
The system will allow you to edit the default action required when each compliance code is present. However, you cannot change the compliance code itself or its title or description.
To edit the default action relating to a compliance code, proceed as follows:
- Search or select Compliance.
- Click File > Configure.
- Click one of the cells under the Action for Work order, Action for Payment or Action for invoice Entry columns for the code that needs to be edited.

- Click the Edit Validation button.
- A window will pop up listing the action options (Valid, Invalid, Verify) plus the option to cancel the edit and return to the Compliance Configuration screen.
- Click on Valid, Invalid or Verify to edit the selected action in each column.
- Click the Valid in the Action for Payment.
- The newly applied default action will appear in the relevant cell on the configure screen.
- Ensure that the correct default has been applied for the correct action.
- Enter an email address for the Compliance Provided in the 'Upload Email' filed for the Export File to email automatically once exported. This field can be left blank and the file manually emailed.
Show OK Codes Configuration Setting
When ticked, the check box Show OK code, Titles and Descriptions for Valid OK Codes provides the option to confirm to the user the code, title and default action for valid codes as well as invalid and verify codes.

Allow Payment to Invalid Contractors
When ticked, the Allow Payment to Invalid contractors check box will allow the user to continue to use a supplier that has been marked with an Invalid compliance code, and the system will prompt the user with an option to Confirm Usage.

An example of how StrataMax would behave to the user when in Creditor Invoices is provided below:
- Once in Creditor Invoices select the creditor to pay. The Compliance window will appear.

- At this point, if the creditor is to be paid without cross referencing any further details, click the Confirm Usage button. In the above screenshot, the creditor has a status of 'Z', which means that the compliance service provider is not monitoring the creditor.
- Click the View Details button to view additional details for the creditor, including the status and license details.


Notify Manager (and others) when Invalid Contractors are used
When ticked, the check box Notify Manager (and others) when invalid Contractors are used provides the option to define email addresses to be notified every time an invalid supplier is used. This setting is only relevant if the Allow Payment to invalid creditors check box is ticked. This option is available in the Compliance, in File > Configure.

Export Inactive Contractors
This box provides the option to include or exclude inactive contractors. When enabled the exported file will no longer include contractors set as 'Inactive' in the Creditor Maintenance menu (see Inactive Creditors for more info). This option will apply to ARM and Trades Monitor Compliance Provider export files. The setting is configured to include inactive contractors by default.

If you have ‘None’ or ‘Self-Managed’ Compliance configured, you will not be able to utilise this feature.
Compliance Import and Export
An initial export file will need to be generated and sent to the provider to validate. To create the file run Export to Compliance Provider process as follows:
- Search or select Compliance.
- Click File > Export to Compliance Provider.
- If the last file is still present you will be prompted with a warning and the option to select Yes or No to overwrite this.
- The export file will then be created and sent automatically to the service provider via the Communications menu if an 'Upload Email' was specified in File/ Configuration.
- Alternatively the export file can be emailed manually to the service provider from the following Windows directory:
- Strata Monitor: <The StrataMax network drive>\bcm\stratmon\<filename>
An example would be: P:\bcm\stratmon\980075M.CSV
- ARM: <The StrataMax network drive>\bcm\compliance\ComplianceExport.xml
An example would be: P:\bcm\compliance\ComplianceExport.xml
Storing the Compliance Data Providers Response file prior to import
After the provider has validated the export file, the data provider will email their reply containing the original list of suppliers (creditors) with additional information added about each one including a rating category.
The file attachment provided with the email (the response file) should be saved into a pre-defined network location so StrataMax can find it for import. The network locations defined for each provider are listed below.
Strata Monitor | Response file network location
If the service provider is Strata Monitor, the file should be saved with the name that Strata Monitor have given it. This will normally be the client ID followed by the file extension .CSV e.g. 980075S.CSV. Save it to the following network location:
\\The StrataMax network drive\bcm\stratmonFor example: P:\bcm\stratmon
Do not change the file name. Save the file with the file name already allocated to the file by Strata Monitor.
ARM | Response File Network Location
If the service provider is ARM, then the file name will be 'ComplianceImport.xml', and should be saved to the following network location:
\\The StrataMax network drive\bcm\COMPLIANCE For example: P:\bcm\COMPLIANCE
Do not change the file name. Save the file with the file name already allocated to the file by ARM.
Response File Import Process
This file should be imported into StrataMax via the following process:
- Search or select Compliance.
- Click File > Import from Compliance Provider.
Where will the Compliance Data be used with StrataMax?
There are a number of areas within StrataMax that will use the compliance information that has been added.
TaskMax
When selecting a contractor for a job or quotation, StrataMax will reference the compliance data stored within the compliance module and alert the user if there are any anomalies relating to the creditor’s compliance status. The creditor compliance status is also checked when processing Periodic Work Orders.
Creditor Invoices
When using Creditor Invoices to enter invoices, StrataMax will reference any available data in Compliance for the selected creditor, and alert the user if there are any anomalies with the creditor’s compliance status.
Frequently Asked Questions
Q. Does everyone need to be out of the StrataMax System to import or export a compliance file?
A. No.
Q. If a service provider is coded as 'Verify' what effect on creating a work order or processing a payment does this have?
A. It does not lock the user out, but a prompt will appear to check. StrataMax has a lock out button if this is required.
Q. If a service provider is coded as 'Invalid' what effect on creating a work order or processing a payment does this have?
A. The service provider cannot be used, and will be locked out. To use the provider a 'G' code would need to be allocated, which means specifically approved by the strata manager's office.
We would like to invite clients to use the feedback facility at the bottom of this article to provide some feedback on this page, so that we can provide as much information to our clients in relation to this service.
