|
|
These records are used for a specific proxy manager report as outlined below, and the most current record will also be reported on the Voting Register. Permanent proxies noted in the Roll will be flagged on the report. For any lot that holds more than one proxy, there will be subsequent lines for up to three for that lot's proxy holder's information, which can be helpful when preparing for meetings.
Proxy Manager | Producing a Report
The Proxy Manager uses the Report Distribution screen. This section serves as a quick reference guide on how to produce the proxy report, along with any requirements and limitations it has.
For a proxy to appear on this report, it must first be added to lots in the Roll. Please see how to add other contact types to a lot for more info.
- Search or select Proxy Manager.
- Click the Advanced button in the top right to display more options, buttons, tick boxes, the recipient list, etc.
- The button name will change to 'Simple', which can be clicked to hide all the options, buttons, tick boxes, the recipient list, etc.
- If you want to run the report for multiple buildings, click the ellipsis button next to the Building field in the top left. Then, choose (tag) the required buildings and click OK. (applies to PDF report only)
- If you want to limit the report to display specific accounts, click the ellipsis button next to the Accounts field in the top left. Then, choose (tag) the required accounts and click OK.
- Use the 'Report Set' Save button if you have added additional Reports or Attachments and would like to save these as a report set to be used again.
- To configure the report, click the cogwheel next to the report/template name.
- Report Order changes the data in the report to an alphanumeric order.
- Include Lots with no proxy can be ticked to include lots in the report even if no proxy is present in that lot.
- The Template is a drop-down menu where you can view the available templates.
- An additional Report or Attachment can be added by clicking the relevant buttons.
- Choose the Distribution Method: Post, Email, Save Report, Use Preferences, and configure each by clicking their respective cogwheels.
- In the 'Report Publish' screen, there are additional options to email the report, save it to DocMax, or save it to a Windows folder.
- Internal Users is the default Recipient Type, and the current user is selected to receive the report. However, the recipient type can be changed, and more recipients can be selected from the list to receive the report.
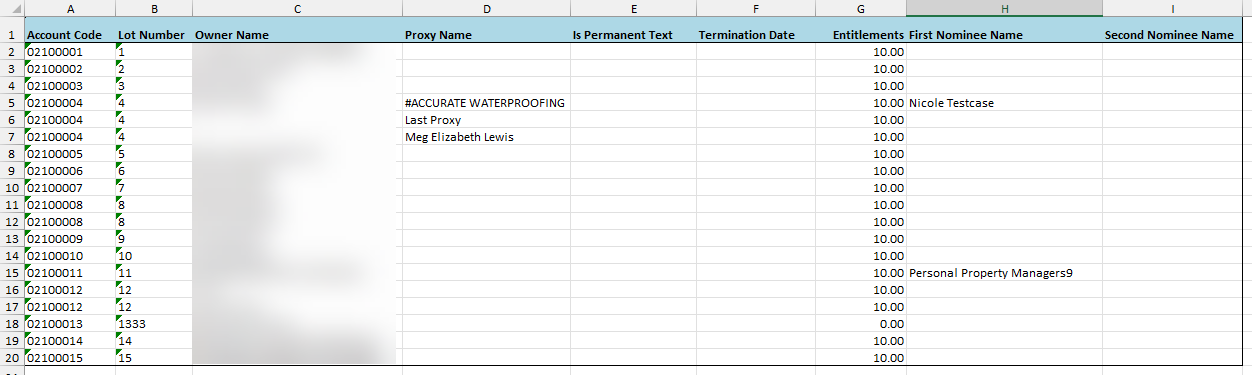
- Click the Excel Report button to export the report to an Excel sheet.
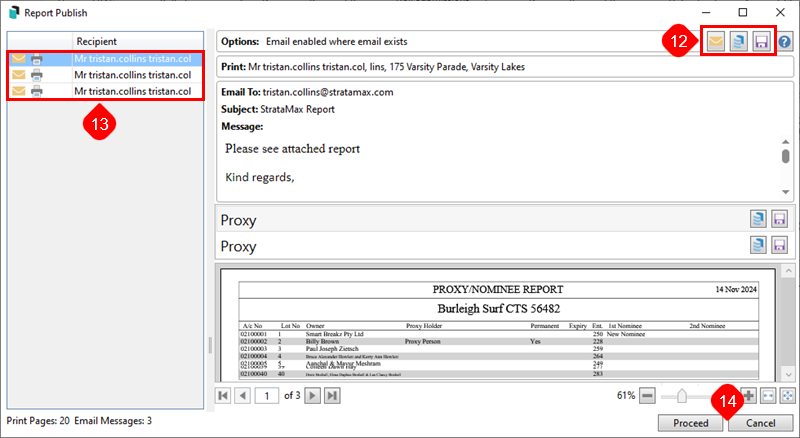
- Click Proceed to display the 'Report Publish' screen where the report can be reviewed before being sent/printed/saved.

- In the 'Report Publish' screen, use the relevant buttons to email the report, save it to DocMax, or save it to a Windows folder.
- If the report is being run for multiple buildings, click through the recipient/s on the left side to view the report for each building.
- If you would like to email/send to multiple recipients, click Proceed. Or click Cancel to close the 'Report Publish' screen and return to make any required changes.

Example: PDF Report. Proxy Holder - 3 records. Nominee - 2 records
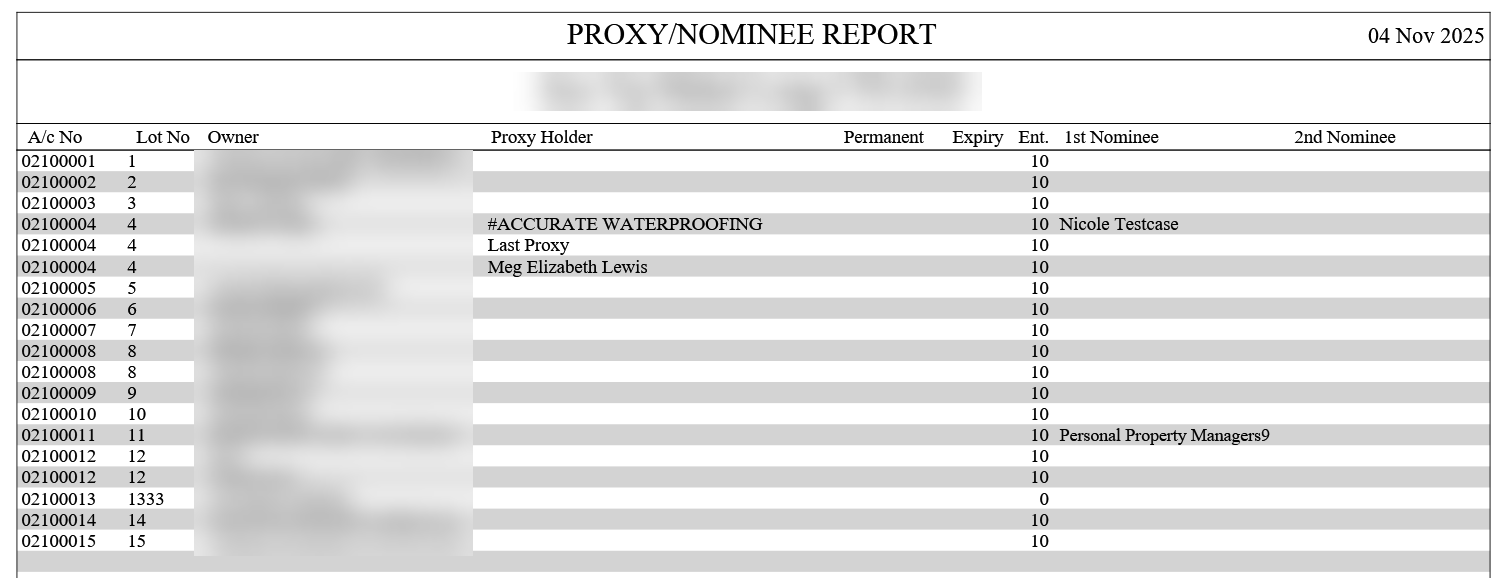
Example: PDF Report. Proxy Holder - 3 records. Nominee - 2 records