 |
|
Insurance Claims is where you can keep a track of all the insurance claims the property has lodged. Depending on your arrangement with the underwriter and/or broker, claim forms can also be produced within the system and sent to the insurer.
Reports can be produced, containing all the details in the claim, and each claim can be linked to other areas of StrataMax with the use of the Premium Accounts, when receipting insurance refunds.
There is also an Insurance Claims Special menu, with the only difference being that it has a Delete button that allows insurance claims to be deleted.
Insurance Claims Video
Insurance Claims Configuration
General
Always show code selection list at start
If ticked, the existing list of policies will always appear when the Insurance menu is opened.
Insurance
Insurance Expiry Test
Chose which insurance policy the system uses to compare against the working date, and if the insurance has expired, a notification will be displayed whenever the building is selected. The default main policy is 901 BUILDING. You can remove this system check by clicking Clear.

Insurance Claims Register
Show Paid Claims
If set, paid claims will be listed in Insurance Claims and Insurance Claims Special sections.
How to Create an Insurance Claim
- Search or select Insurance Claims and if the list of current claims appears, click Cancel.
- Click New (a claim number will be generated automatically).
- Enter the relevant details:
- Reference Name for the claim (e.g. Storm). The same name can be used more than once, despite the warning that appear.
- Enter the Date of Incident.
- Insurance Code No is the insurance policy item, which is entered in the Insurance menu, and is being claimed against.
- This will populate insurer details (i.e. Insurer, Policy Number and Excess etc).
- Amount Claimed - this may be filled in by completing Events information if used previously.
- Excess for this claim will populate automatically when the refund is present in the Bank Reconciliation menu and is receipted to the Insurance Refund Code (income code), which has been set up in the Insurance menu, in the Premium A/c's screen.
- What Happened? is for the incident details, which caused the damage and the basis of the claim.
- If theft was involved, then enter details of advice to police.
- Click Save.

Linking a Document
Once a claim has been entered; a document from DocMax may be linked to the claim for quick access.
- Open DocMax.
- Locate the document, and click the View Document button in the ribbon.
- Under the References section, click the Insurance Claims drop-down menu and select the appropriate claim.
- Click the Save and Close button in the ribbon.

To view the document again, open the claim and click the Document button.
Adding Claim Events
Before adding an event, the invoice for the repairs must be entered first.
- Open the Insurance Claims menu.
- In the Insurance Claims Register window, double-click the required claim in the list.
- Click the Events button.
- Click the Add button (this will create a blank record at the end of the list).
- Double-click in the Reference Number field.
- Select the Creditor who provided the goods or carried out the repair and click OK.
- Select the appropriate Creditor Invoice record (reference starts with ‘D’) and click OK.
- This will populate the fields for Replacement Cost, Claim Amount, Creditor Code and Repairer/Supplier.
- Double-click the Event Category field and select an option.
- Double-click the Property Affected field and enter details, for example "All top floor units" or "Roof".
- If required by the insurer, enter the Date of Purchase and Original Purchase Price fields.
- The Other Details field can be used to enter details of Power Rating and Equipment Use if the claim Event Category is for Fusion.
- The Amount Claimed figure will update as Events are added.
- Click Close once all required information has been entered
Claim Event Entry > Options
Select From Transaction List
This allows an expense from the current year transaction list to be selected to create a claims event.
Select From Transaction List - Old Year
This allows an expense from the old year transaction list to be selected to created a claims event.
Select from Claims Receipt Manager
Is used to link a receipt to a claim event.

File > Edit Claim Form Lodged By
Details of who the claim is lodged by is populated onto the claim form using the Account Manager details, however this can be edited if required.
- In the Claim Event Entry window, click File > Edit Claim Form Lodged By.
- Change Lodged By and the phone number.

Delete Insurance Claim
If an Insurance Claim has been entered in the incorrect property, or if the claim needs to be removed entirely, this can be deleted from Insurance Claims Special menu, by selecting the record and clicking the Delete button (please use with caution as once the information is deleted it cannot be retrieved).
Processing an Insurance Refund
In order to update the insurance claim refund information when receipting refunds through the Bank Reconciliation menu, the Premium Accounts setup is needed, and the following setting in the Receipt Entry is also needed.
- Open the Receipt Entry menu.
- Click File > Configure.
- Tick Offer Insurance Claim Matching. Be aware that this setting only applies to the current logged in user.
There are two ways an insurance claim refund can be processed and linked to a claim in order to finalise it.
- When the refund is present in the Bank Reconciliation menu, post and receipt the funds to the Insurance Refund Code, which has been set up in the Insurance menu, in the Premium A/c's screen.
- Linking the claim to an existing receipt through the Claim Event Entry menu, by clicking Options > Select from Claims Receipt Manager.
Work Orders for Insurance Claims
Work Orders in TaskMax can also create a new insurance claim by ticking the Insurance Claims box. See TaskMax Work Orders for more info.
Claim Forms
Once a claim has been created, a claim form can be created by adding details for each item being claimed. These can be added manually or by selecting a Creditor Invoices record. The total amount of the items is recorded in the Claims Register Record. The Claim Form can be submitted to the insurance company with the usual attachments.
- Search or select Insurance Claims.
- Select the Claim and press OK .
- Select Claim Form.
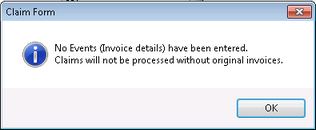
- If the following message appears, creditor invoices have not been added as per 'Adding Claim Events'. There may be quotes which will be attached via email to the claim. If this is correct, click OK. However if creditor invoices have been added to the claim, this message will not display.
- If the following message appears, creditor invoices have not been added as per 'Adding Claim Events'. There may be quotes which will be attached via email to the claim. If this is correct, click OK. However if creditor invoices have been added to the claim, this message will not display.

- Click OK.
- The report is in PDF, which may be emailed with attachments such as invoices or quotes.
To add the 'Amount claimed as percentage of GST' and 'Applicable to the premium Amount Claimable' on the claim form, these are updated in Building Information menu.
Insurance Claim Templates
Depending on what information is required to output on the template, there are a few to select from. Some of these include the EFT details for the building. To select from these templates complete the following:
- Search or select Insurance Claims.
- Select the Claim and press OK .
- Select Claim Form. Click OK to No Events (invoice details) have been entered. Claims will not be processed without original invoices.
- Select the template required and click 'Select as Global'

Insurance Claims Reports
Throughout StrataMax there are various reports and extracts that can be produced, which relate to insurance claims. An extract of insurance claim data can also be produced and exported to Excel using the Search Insurance Claims screen. This can be used for a single (local) or multiple or all buildings (global).
Insurance Claims Register (Local)
This report is produced from within the claim, in the Insurance Claims menu. It is limited to the building, and has multiple templates to choose from, and can be produced in Excel. It displays all the claims for the building, but can be limited as well.

- Open the Insurance Claims menu, and if the current list of claims appears, click Cancel.
- Click the Report button on the right, and the Report Setup screen will appear.
- Choose your output method (Screen, Printer, Excel) by selecting the required radio button.
- To change the template, click the ellipsis [...] button to the right of the Template field.
- Click the Preview button to display the data in a Preview screen.
- Change the Limits according to requirements.
- Click OK.
Group Reports | Insurance Claims Report
This report can be produced for multiple buildings, and will display all claims and their information across selected buildings:
 Insurance Claims Report
 Insurance Claims Report + Remarks
- Open the Reports/Utilities (Global) menu.
- Click Group.
- Use the Search to find 'claim', then select the required report and click OK.

- Choose the radio button for your output method; Screen, Printer, File (.txt file, which can be opened in Excel afterwards).
- Click the Select Buildings button, then tag the required buildings (Ctrl + A for all), the click OK.
- Change any of the Limits if required.
- Click the Proceed button, then change the Sort Preference if needed before clicking OK.

Custom Query | Insurance Claims Report
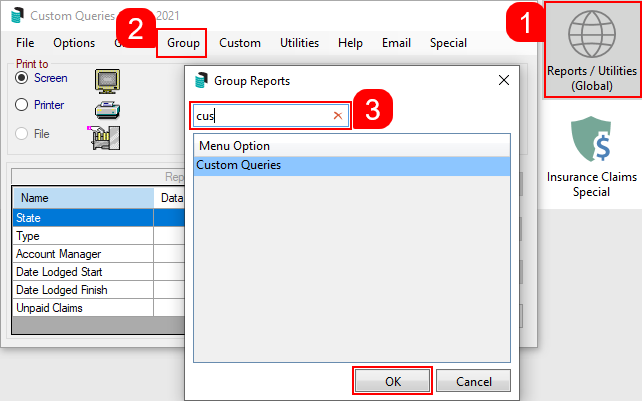
- Open the Reports/Utilities (Global) menu.
- Click Group.
- Use the Search to find 'cus', then select the 'Custom Queries' report and click OK.
- Click the Select Buildings button, then tag the required buildings (Ctrl + A for all), the click OK.
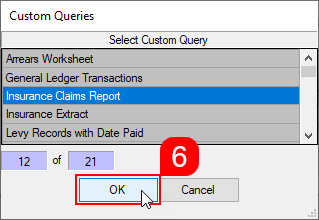
- Click the Proceed button, and the Select Custom Queries list will appear.
- Select the 'Insurance Claims Report' then click OK.
- In the Insurance Claims Query window, the following settings can be selected:
- Claims Status: Limit the data to claims with a certain status.
- Incident Dates: Limit the data to incidents that occurred between two dates.
- Report Order: Changes the order of the displayed data to be either building name or number.
- Report in Excel: Will output the data to Excel.
- Summary: When ticked, the report will not display the data for each building on a separate page.
- Replace Remarks with Events: Replaces the data in the 'Remarks' field in the claim with the data in the 'Repairer/Supplier' field in the claim's event.


