MaxSelect allows you to import addresses from within a building into Microsoft Word or Excel. This will save you time when writing a letter to an owner/committee member or creditor.
MaxSelect Video
Set Up MaxSelect
For all versions, you must remember to return the Security Settings back to their original settings. Untick 'Trust access to Visual Basic Project', and reset the security level as desired.
Word Macro Security
You need to ensure that the PC running this function is able to run / recognise Visual Basic Project, as well as have appropriate Macro Security (All Macros Enabled) in order for the MaxSelect functions to work.
- Open Word.
- Click the File menu, then Options.
- Open the Trust Center options, and then click the Trust Center Settings button.
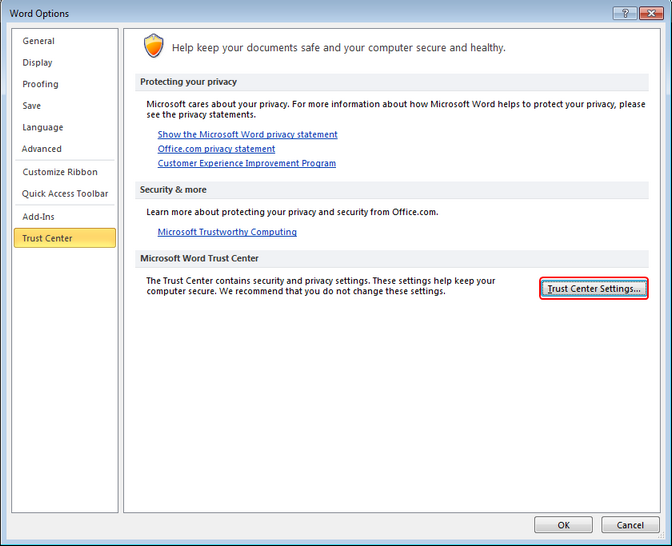
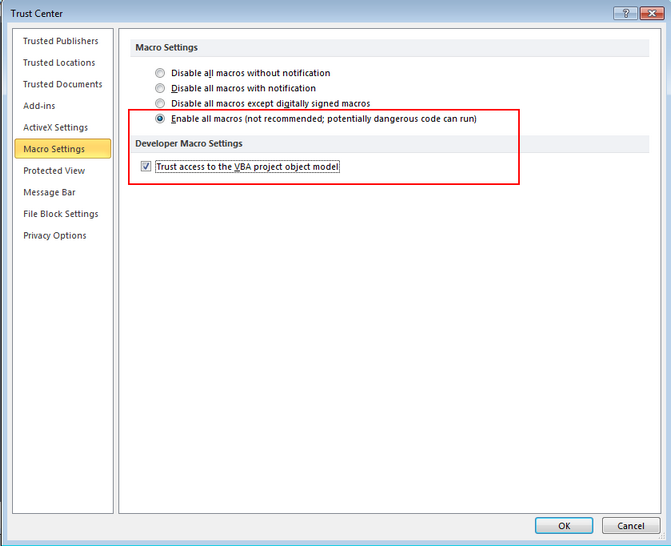
- In Trust Center Settings ensure that Trust access to the VBA project object model is ticked as well as Enable all macros. This can be set back to Disable all macros after the installation is complete (step 8. below). Click OK, then close the Word Options menu.


MaxSelect Installation
- Open MaxSelectInstall.doc, which should be located in network Drive/BCM/Setup/MaxSelectInstall.doc, or it may have the extension .docm, depending on which version of MS Office you have installed. You will then see the following:
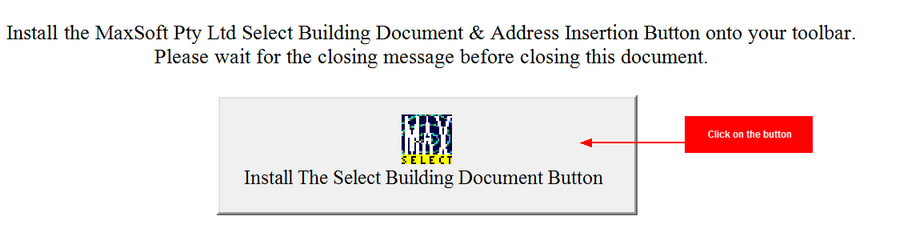
- Click the button 'Install The Select Building Document Button', and the installation will begin, and add MaxSelect to the 'Add-Ins' menu in Word.


Add MaxSelect to the Word Ribbon
- Open Word
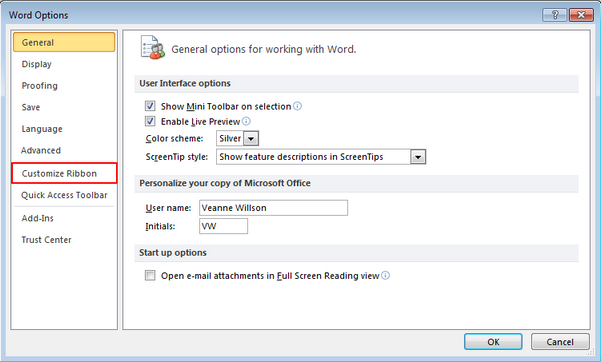
- Click the File menu, then Options.
- In the Word Options menu, select Customise the Ribbon.
- Click the Choose Commands from drop-down list on the left and select Macros.
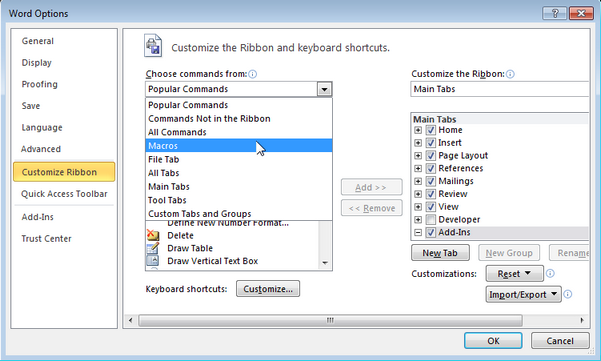
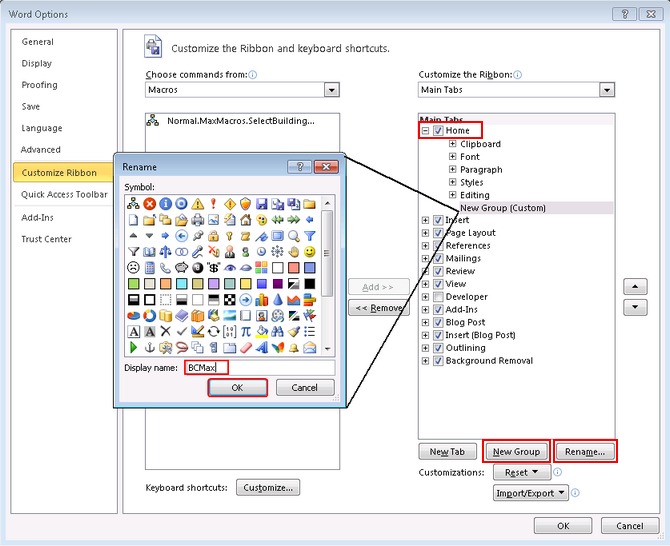
- In the list on the right, select the Home menu and click the New Group button at the bottom.
- The new group will appears in the list, so whilst highlighted, click the Rename button at the bottom, name the group and click the OK button.
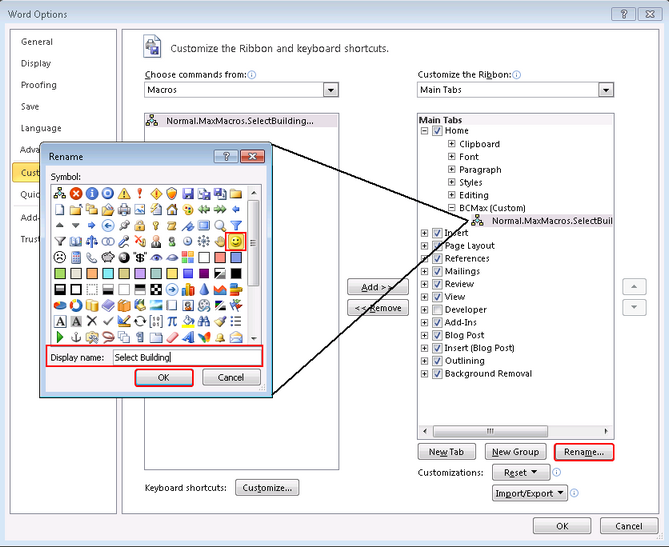
- Select the new group you just created in the list on the right, and then select 'Normal.MaxMacros.SelectBuilding....' in the list on the left, and click the Add >> button in the center.
- This will added the MaxSelect add-on to the list on the right, under your new group.

- This will added the MaxSelect add-on to the list on the right, under your new group.
- Now select the 'Normal.MaxMacros.SelectBuilding...' and click the Rename button, then choose a Symbol and enter the Display Name and click OK, then click OK again to close the Word Options window.


Using MaxSelect
Once installed and set up in Word, you can use the add-in to save or open documents. The default for saving the documents is to the building, doc folder.
- Open Word and click on the MaxSelect icon under the Add-Ins tab in the ribbon.
- The name and appearance of this icon will depend on what was selected during the setup of the MaxSelect add-in (see step 8. above).
- The list of buildings will appear in the MaxSoft - Building Document Selection window.
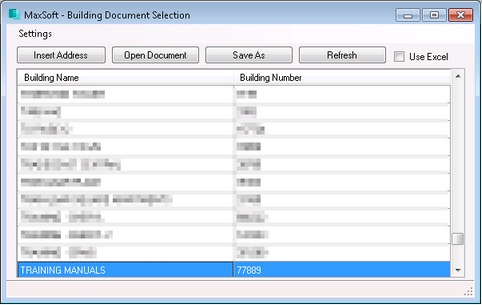
- Select the building and click the Insert Address or Open Document buttons.
- You can click in the top cell of either column, and then start typing to jump to that building.
- Now you can select an owner’s name from the list or select the required radio button under the Select Option section in the top right (Creditors, Committee, etc.).
- If an owner has more than one address you can then use the drop-down list in the bottom right to select from the three different addresses from within the Roll menu.
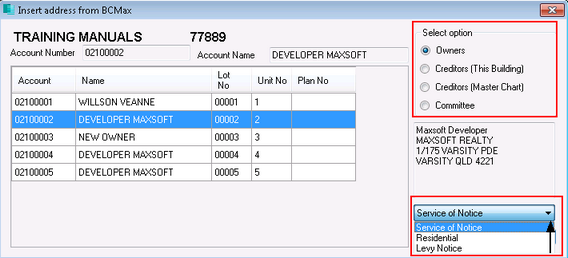
- If an owner has more than one address you can then use the drop-down list in the bottom right to select from the three different addresses from within the Roll menu.


Max Select in Excel
- Open Word and click on the MaxSelect icon under the Add-Ins tab in the ribbon.
- Open MS Excel, and minimize it.
- Back in the MaxSelect add-in window, a Use Excel box will now be visible.
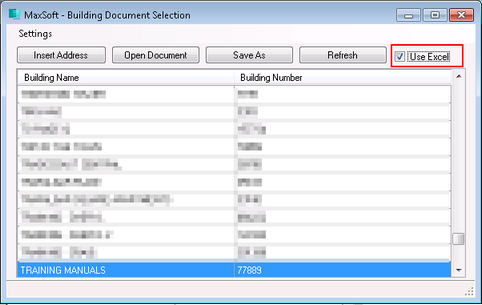
- Simply tick the box, then bring Excel back on screen, and you can add names and addresses into Excel.

